BLACK ICE is Back.    20% off everything use code: blackice

How ICESPIKE Works

See our spikes in action.

Easy installation instructions.

Installing Spikes

Icespike will not damage the sole of your shoes or boots!

See how ICESPIKE™ compares to sheet metal screws.

Installation

Installing ICESPIKE™ on your new or gently worn favorite rubber-soled footwear creates non-slip shoes and non-slip boots! There is no better ice traction device than the Original ICESPIKE™ - it is equally effective on ice, snow, mud, rocks, loose gravel or any rugged, slick terrain in any season. ICESPIKE™ transitions with ease and can even be worn on dry pavement!

ICESPIKE™ is a traction system of 32 spikes and an installation tool which is used to apply the spikes directly to the sole of a shoe or boot. The ice spikes are specifically engineered of cold-rolled, top quality steel to maintain hardness and integrity of grip ten times longer than any other system of ice cleats or snow cleats. The unique patented design of the spikes provides unsurpassed surface penetration and stability, and the spikes are self-cleaning. The locking design of the screw keeps them firmly in place, yet the fine thread allows removal with no visible trace.

The recommended installation pattern is 12 spikes per adult size shoe, 3 on each side of the forefoot and 3 on each side of the heel; 24 spikes per pair of shoes. 8 additional spikes are included. Depending on size of shoe or type of foot strike, users can individualize their installation for custom traction.

ICESPIKE™ ice grippers make it simple and easy to turn your footwear into winter running shoes, shoes for winter walking and winter hiking, winter trail running shoes and winter work boots. Get traction on ice, traction in snow, and stability on any treacherous surface!

Watch Chantal Demers Hall of Fame Canadian Runner show you how to install her favorite traction Icespike.

Installing Icespikes Step 1

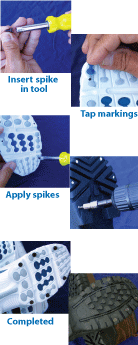
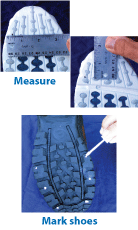
Step 1: Marking shoes for installation:

Mark spike position with magic marker or liquid white out.

Start about 1 1/2" back from the toe and 3/8" from outer edge. Try to space the front 6 spikes equally along the sole of the shoe (3 on each side). The heel spikes will be closer together because there are 6 spikes in a smaller area (again 3 on each side). The placement does not have to be perfect.

Do not place any spikes in the arch area. Spikes placed in the arch of the shoe do not help a great deal with the traction.

Note: Fewer spikes may be adequate for small adults' or children's shoes.

Installing Icespikes Step 2

Step 2: Installing the ice spikes:

There are two ways of installing the spikes - either with the ICESPIKE™ tool included with your Deluxe package or a variable speed drill.

Hold your shoe on a flat surface such as a workbench, table or floor.

Using the ICESPIKE™ tool: Tap each of the markings with a sharp tool such as an awl, ice pick, skewer or push pin to break the rubber, allowing you to screw in the spikes. Place a spike in the tool, using a little pressure to start the spike. As soon as the spike grabs the rubber of the sole, it is easily screwed down.

Using a variable speed drill: Attach a 1/4" hex head socket to the drill. Place a spike in the socket, and hold the drill firmly at each marked spot. Start slowly and drill the spike into position, being careful to tighten only until spikes are snug against the sole.
Do not over-tighten!

The patented washers that are a part of the spike will not let it slip out of place or allow it to come unscrewed, unless you choose to remove it with the tool or drill. If a spike in one position shows more wear than the others, it is easily removed and a new one installed close to the original position.

Note: For extra-heavy duty use, a dab of super glue or epoxy will help anchor the spike, yet is also easy to remove, popping off when screw is loosened for removal.

Want some more guidance? Check out our Tips & Tricks:
Tips & Tricks

Do's and Don'ts

ICESPIKE™ is an Economical, One-Size-Fits-All traction system with superior traction and durability that is easy to install. One set of ICESPIKE™ can last up to 500 miles of wear!

DO:

  • *Do space ICESPIKE™ evenly across the ball of the foot and the heel of the foot
     
  • *Do mark your shoe before you install ICESPIKE™
     
  • *Do arrange ICESPIKE™ in the same pattern on each shoe
     

DON'T:

  • *Don't install ICESPIKE™ too close to or too far away from the edge of the shoe
     
  • *Don't install ICESPIKE™ in grooves or channels in the sole - some shoes have fairly deep grooves for channeling water away from the sole and for extra traction. If the pattern you have set hits one of these channels, move the spike forward, back or sideways to avoid the groove.
     

CAUTION:

  • ICESPIKE™ outfitted shoes and boots should NOT be worn on any indoor wood flooring or surface that can be damaged by the spikes
  • *Treat your ICESPIKE™ outfitted footwear the same as you would your golf spikes or ice skates
  • ICESPIKE™ is not liable or responsible for any injury, loss or consequential damage from the use of this product including but not limited to the installation and wearing of this product.
  • ICESPIKE™ is designed to assist the wearer with traction on ice and snow and difficult terrains, but will not eliminate the inherent dangers of running and/or walking on any surface.
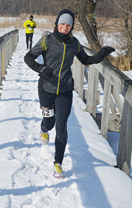
Icespike Runner In Snow
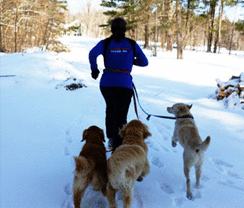
Walker With Dogs Using Ice Spikes On Shoes
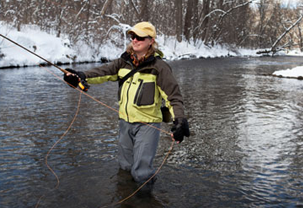
Fisherman with tracking system on shoes
Workers with ice traction system on shoes
Senior Citizens using icespike to prevent slips and falls
Nancy Hobbs running with icespikes
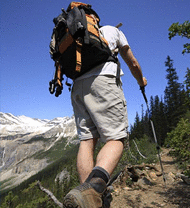
Hiker using Ice Spikes on boots
Runner With Dogs
Dan running with icespikes on shoes
michele yates runs with icespike

Unbelievable the traction that Icespike provided on the entire Appalachian Trail last summer. Made the trek enjoyable. On to the John Muir Trail and the High Sierra Region.

- Tim, Professional Photographer and Graphic Designer
Subscribe to our newsletter to get the latest updates from Icespike!
Email Format: